Approving New Vendor Applications
Once the vendor has been approved through the justification approval process, it moves on to the application approval process which allows the purchasing department to add the final details required for the vendor, and when it is approved will also create the new vendor record for you.
NOTE: This is part of the Configuring and Using Vendor Requests blueprint series where we show how to manage the vendor on-boarding process through Dynamics AX and the web portals. If you want to see all of the other posts in this series, click here.
How to do it…
To approve a new vendor application, follow these steps:
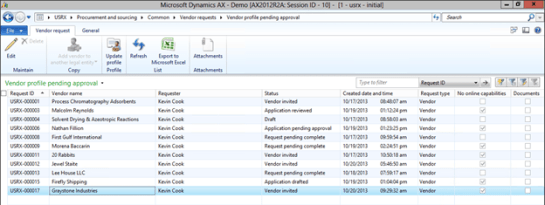
- To see all of the pending vendor requests, click on the Vendor profile pending approval link within the Vendor Requests folder of the Common group on the Procurement and sourcing area page.
- As new vendor requests are initially approved by the users, they will show up here in the Vendor profile pending approval form. Click on the new vendor request that you just entered.
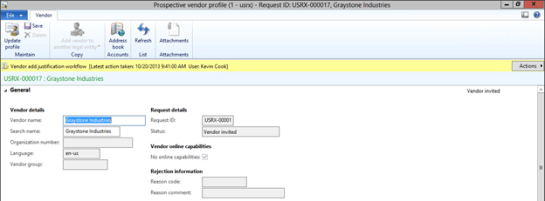
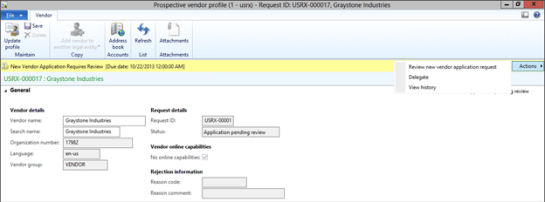
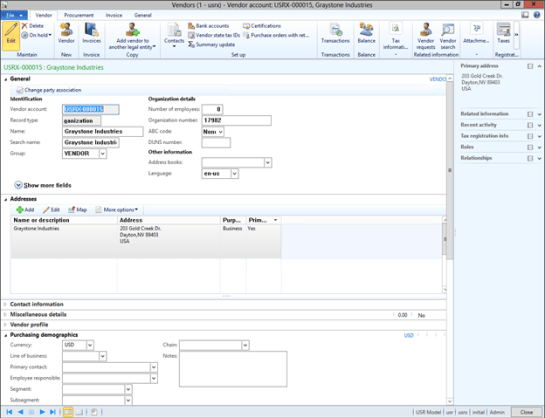
- This will open up a simplified Vendor details form with the information from the vendor request. There are some fields that need to be populated still though, so click on the Update profile button within the Maintain group of the Vendor ribbon bar.
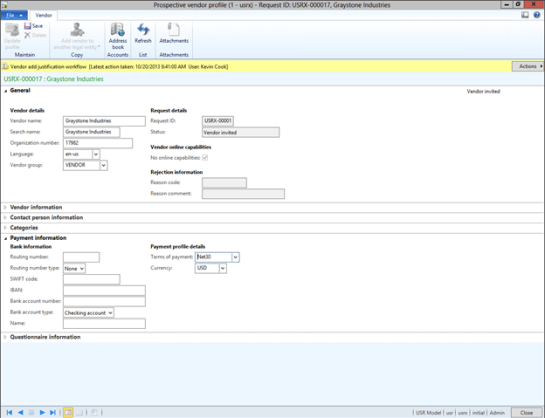
- Fill in the required fields such as the Vendor group and the Currency, and when you have finished click the Save button within the Maintain group of the Vendor ribbon bar.
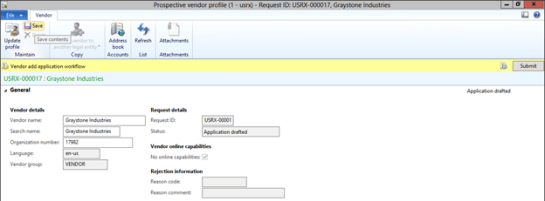
- You should notice that the Actions button will change and now be labeled Submit which means that all of the necessary information has been updated in the record.
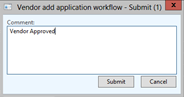
- Click the Submit button, enter any additional comments that you want to be associated with the workflow, and then click the Submit button in the dialog box.
- This will then notify the reviewer in the workflow that they have a new vendor request that needs to be reviewed. They are able to open up the request and from the Actions workflow menu item click on the Review new vendor application option.
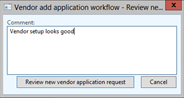
- When the Vendor application review dialog box is displayed the reviewer is able to enter in any comments and then click the Review new vendor application request button to move it onto the next step in the workflow.
- The final step in the workflow is to approve the vendor application. After being notified, the approver is able to open up the vendor request and from the Actions menu button in the workflow toolbar they can route the request back to the approver, or click on the Approve button to complete the vendor approval process.
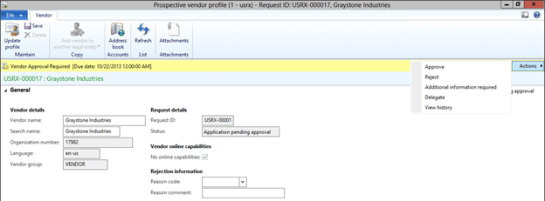
- The approver is then able to add any comments to the approval, and then click Approve to finish the process.

- After the approval is completed, the status of the vendor request will change to Application Approved and the user is able to click the Close button to finish the process.
How It Works…
If you look at the Vendors tables, you will notice that there is a new vendor record that has automatically been created based of the vendor request.
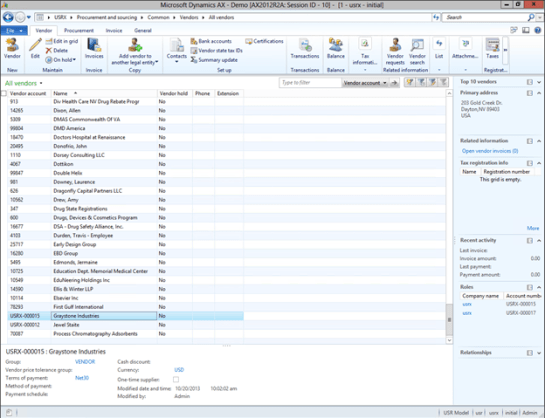
All of the information from the Vendor Request would have been copied over to the new vendor record that was created.
How cool is that.

This is great so far..however I got stuck because I do not have automatic vendor numbering turned on..how do I set that parameter?
Carol, go into the Accounts Payable parameters and check within the Number Sequences section – you shold find one there for the vendor number which you can then switch to manual numbering – Murray.