Creating a Service Agreement
Service Agreements are the basis for all of your service orders. They allow you to define the default structures of your Service Orders and also link back to the project management area so that you are able to bill for any activity that has been performed against the service orders. As a result, the first step in the process of configuring Service Management is to create a Service Agreement.
NOTE: This is part of the Configuring Service Management to track Service Orders blueprint series where we show how to configure Service Management to track service order details. If you want to see all of the other posts in this series, click here.
How to do it…
To create a Service Agreement for a customer account, follow these steps:
- From the Service Management area page, select the Service agreements menu item from within the Service agreements folder of the Common group.
- When the Service Agreements list page opens up, click on the Agreement wizard button within the New group of the Service agreement ribbon bar.

- When the Service Agreement wizard is displayed, click then Next button to start the process.

- Select the Customer account that you would like the service agreement to be associated with.
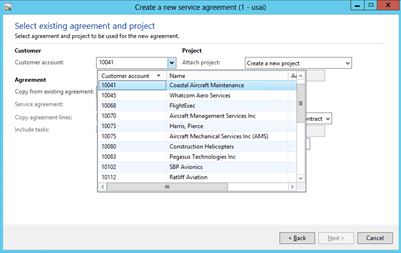
- Then select the Create a new project option from the Attach project drop down to tell the system that we want to create an entirely new project to track this information.
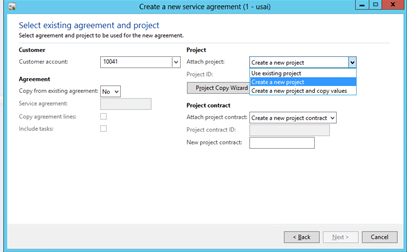
Note: If you have already created a project for the customer, and would like to mingle the Service Agreements, then you can select the Use existing project
option. - Within the Project contract group, enter a description of the Service Agreement into the New project contract field.
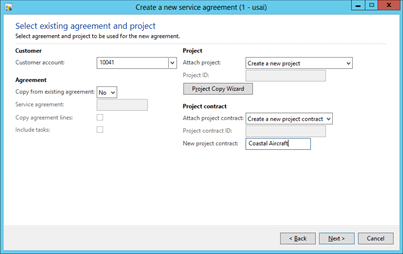
- When you have done this, click on the Next button to move to the next step in the wizard.
- For the new project creation defaults, select Time and material for the Project Type.
- Select a Project group.
- Enter the name of the Service Agreement into the Project name field so that we can easily trace the project back to the agreement.
- Finally set the default Line property. In this case we want all lines to be chargeable unless we override the value.
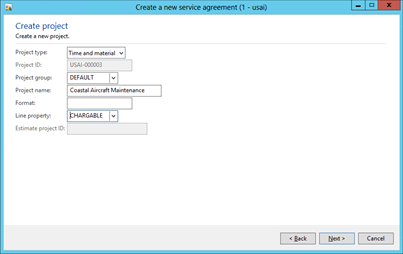
- When the project defaults have been defined click on the Next button to continue to the next step.
- For the new agreement creation defaults, enter a Description for the Service Agreement.
- Enter a date into the Start date field to specify when you want the agreement to be effective.
- If you want to have default service technicians to be associated with this Service Agreement then you can also specify those here as well.
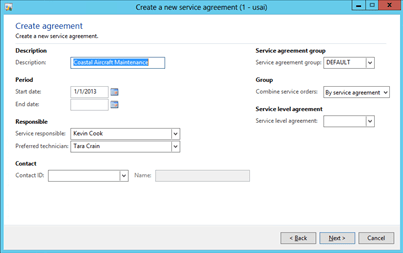
- When you have configures the defaults for the Service Agreement click the Next button to continue on.
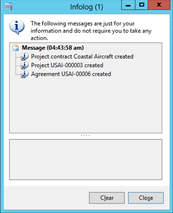
- When you reach the confirmation page, click the Finish button to have the system create your Service Agreement.
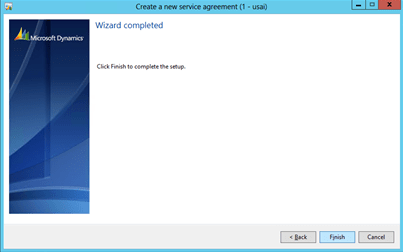
- You should receive an Infolog box showing that the Service Agreement has been created.