Grouping Related Attributes
If there are attributes that are related to each other then you may want to show them together in the configuration dialog box. To do this we need to change the way that they are displayed within the UI.
NOTE: This is part of the Building Dynamic Products with the Product Configurator blueprint series where we show how to configure product configuration models within Dynamics AX, and use them to create dynamics BOM’s and Routes based on the configurations. If you want to see all of the other posts in this series, click here.
How to do it…
To group related attributes, follow these steps:
- Open the Product configuration model maintenance form and click on the User interface button in the Product model details group of the Models ribbon bar.

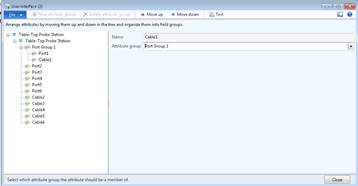
- This will open up the User interface maintenance form. You can move the attributes around just by selecting them and clicking on the Move up and Move down menu items. But if you want to nest them together to make them stand out, then click on the New attribute
group button in the menu bar.

- Give your attribute group a new name, and then click on the OK button.

- Now select the attribute that you want to move and select the group name from the Attribute
group drop down list. - You can repeat this step for any other attributes you want to group.
- After you have created all of your groupings, just click on the Close button.
How it works…
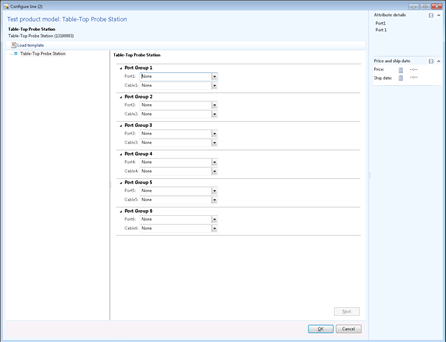
Now that we have configured an attribute groups, we can see it in action by clicking on the Test button in the Run group of the Model ribbon bar. We will now see sections for each of the groupings that we created.