Adding Configuration Attributes
The way that the configurations are personalized are though Configuration Attributes which the user will update as they are building their product variation.
NOTE: This is part of the Building Dynamic Products with the Product Configurator blueprint series where we show how to configure product configuration models within Dynamics AX, and use them to create dynamics BOM’s and Routes based on the configurations. If you want to see all of the other posts in this series, click here.
How to do it…
To add a configuration attribute, follow these steps:
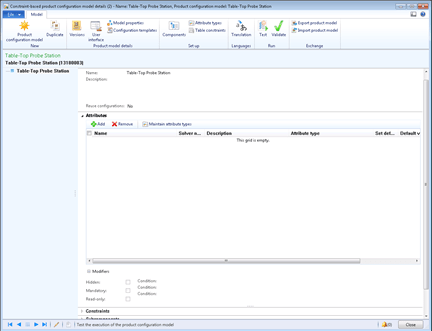
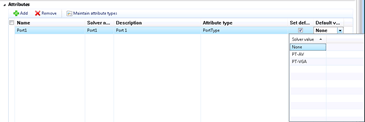
- The first step is to create any new types of attributes that you may be using in this model. To do this, open the Product configuration model maintenance form and expand the Attributes panel. From the Attributes menu bar, click on the Maintain attribute types menu button.
- In the Attribute types form, click on the New button in the menu bar to create a new attribute type, and give it a Name.
- Rather than having a free-text value that the user enters in, it’s sometimes better to give them a list of valid configuration values that they can use in the Attribute Type. To do this, check the Fixed list check box.
- Then click the Add button in the Values panel menu bar to add the valid values.
Tip: In these examples, we create the first entry as None. This allows you to have a null value that represents that the user has not selected anything yet. - Repeat the last step for every one of the valid configurations that you allow for the Attribute type.
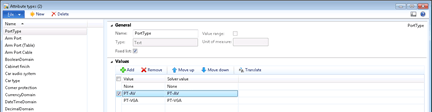
- When you have finished, click the Close button to return to the product configuration model.
- Once we have an attribute type, we will create the Attributes that we will be using to describe our product. To do this, click on the Add menu item in the Attributes panel.
- Give your attribute a Name which will be a friendly name for you.
- Give it a Solver name. This is the variable name that you will use to reference it later on in your configuration rules.
- Add a Description where you can add more detailed information about the attribute.
- And then from the Attribute type drop down box, select the Attribute type that you just created which will be used as a template for this attribute.|
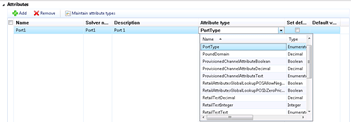
- Finally check the Set default value check box, and select one of the Attribute values from the Default value drop down box. We used the None value so that we will default it in as the unselected value.
-
How it works…
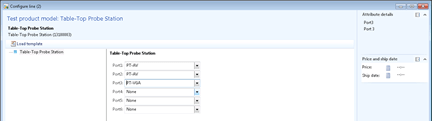
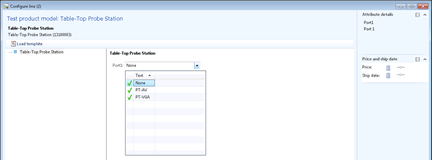
- Now that we have configured an attribute, we can see it in action by clicking on the Test button in the Run group of the Model ribbon bar.

- This will open up a configuration window, and we will see our attribute and be able to select form the drop down box the value that we want.
-
We can add more attributes exactly the same way. Note that in this example, we are creating six attributes that are similar, so we are reusing the same attribute type.
If we click the Test button again we will now see all of the other attributes that we created.