Creating New Retail Product Hierarchies
Dynamics AX allows you to organize your products into what are referred to as Retail Product Hierarchies, which allows you to create a tree structure of products with an unlimited number of levels and groupings. This allows you to then use these hierarchies to choose what products are to be used by the retails stores by group rather than by individual product, making the maintenance and deployment of the products much easier as you add and remove products from your catalog.
NOTE: This is part of the Setting Up A Retail Store With POS blueprint series where we show how to configure the retail module within Dynamics AX, and then deploy out the Point Of Sale registers for capturing sales. If you want to see all of the other posts in this series, click here.
How to do it…
To create a new retail product hierarchy, follow these steps:
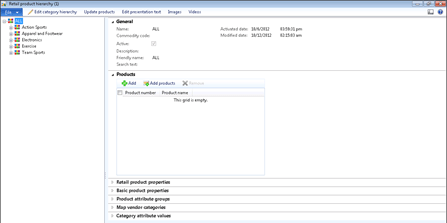
- Open up the Retail product hierarchy menu item from the Catalog hierarchies’ folder of the Setup group on the Retail Area page.
- This will open up the Retail product hierarchy view. To add a new section to the hierarchy, click on the Edit category hierarchy button in the menu bar.
- This will open up the hierarchy editor. If you are not currently in edit mode, click on the Edit button in the Maintain group of the Category hierarchy ribbon bar.
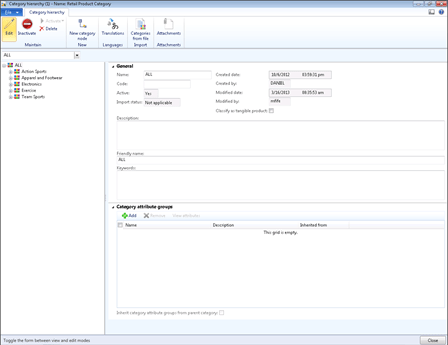
- Once in edit mode, you will be able to create new structures within the hierarchy. To create a new base category, select the ALL node in the hierarchy tree and click on the New category node button in the New group of the Category hierarchy menu bar.

-
When the new node is created, you can assign the category node a Name, Description, Friendly Name, and Keywords.
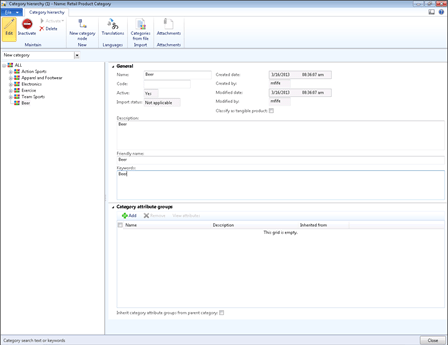
NOTE: You can continue this process and create as many different nodes in your
hierarchy as you like, and also create as many levels as you like.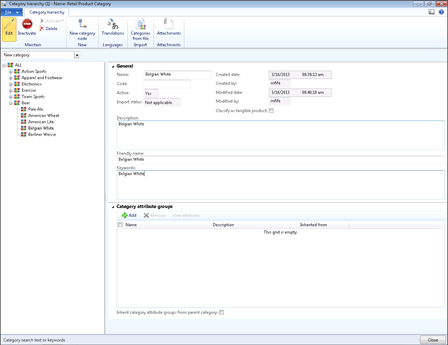
- Once you have finished, just click on the Close button to return to the main Retail Product Hierarchies form.
- Now you need to assign products to your hierarchy. To do this, select the node that you want to add the products to, and open up the Products section of the record. To add a single product, click the Add button.
- This will open up a list of all the Products that you have configured in your system. Select the product that you want to add and click the Select button.
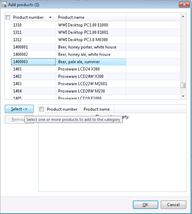
- Repeat the process to add as many other products as you like to the category node, and then click the OK button to update the products.
- If the products were not initially set up and configured as Retail Products, then Dynamics AX may ask you if you want to update the products with retail configurations.
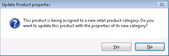
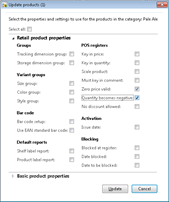
If you click Yes then it will ask you what information you want to update on the Released Products record. In this case we will allow for negative inventory and also zero prices – although you may not want to do this in a real system.
After clicking Update the system will add your products to your hierarchy node. Repeat for all of your other products and then click the Close button on the form to finish the process.
